
When considering a ceiling makeover, many homeowners ask one key question: can tin ceiling tiles be installed over drywall? The answer is yes—drywall provides a flat, stable surface that works well with tin tiles. With proper preparation and the right installation method, you can turn a plain, painted ceiling into an elegant design feature that transforms the entire room.
Installing tin tiles over drywall doesn’t require tearing out the old ceiling or starting from scratch. Instead, you can use either a nail-up installation method or a drop-in grid system. Each approach has its advantages, and choosing the right one depends on your ceiling’s condition, the look you want to achieve, and how much time you’re willing to invest in the project.
Nail-Up Installation: A Classic, Seamless Finish
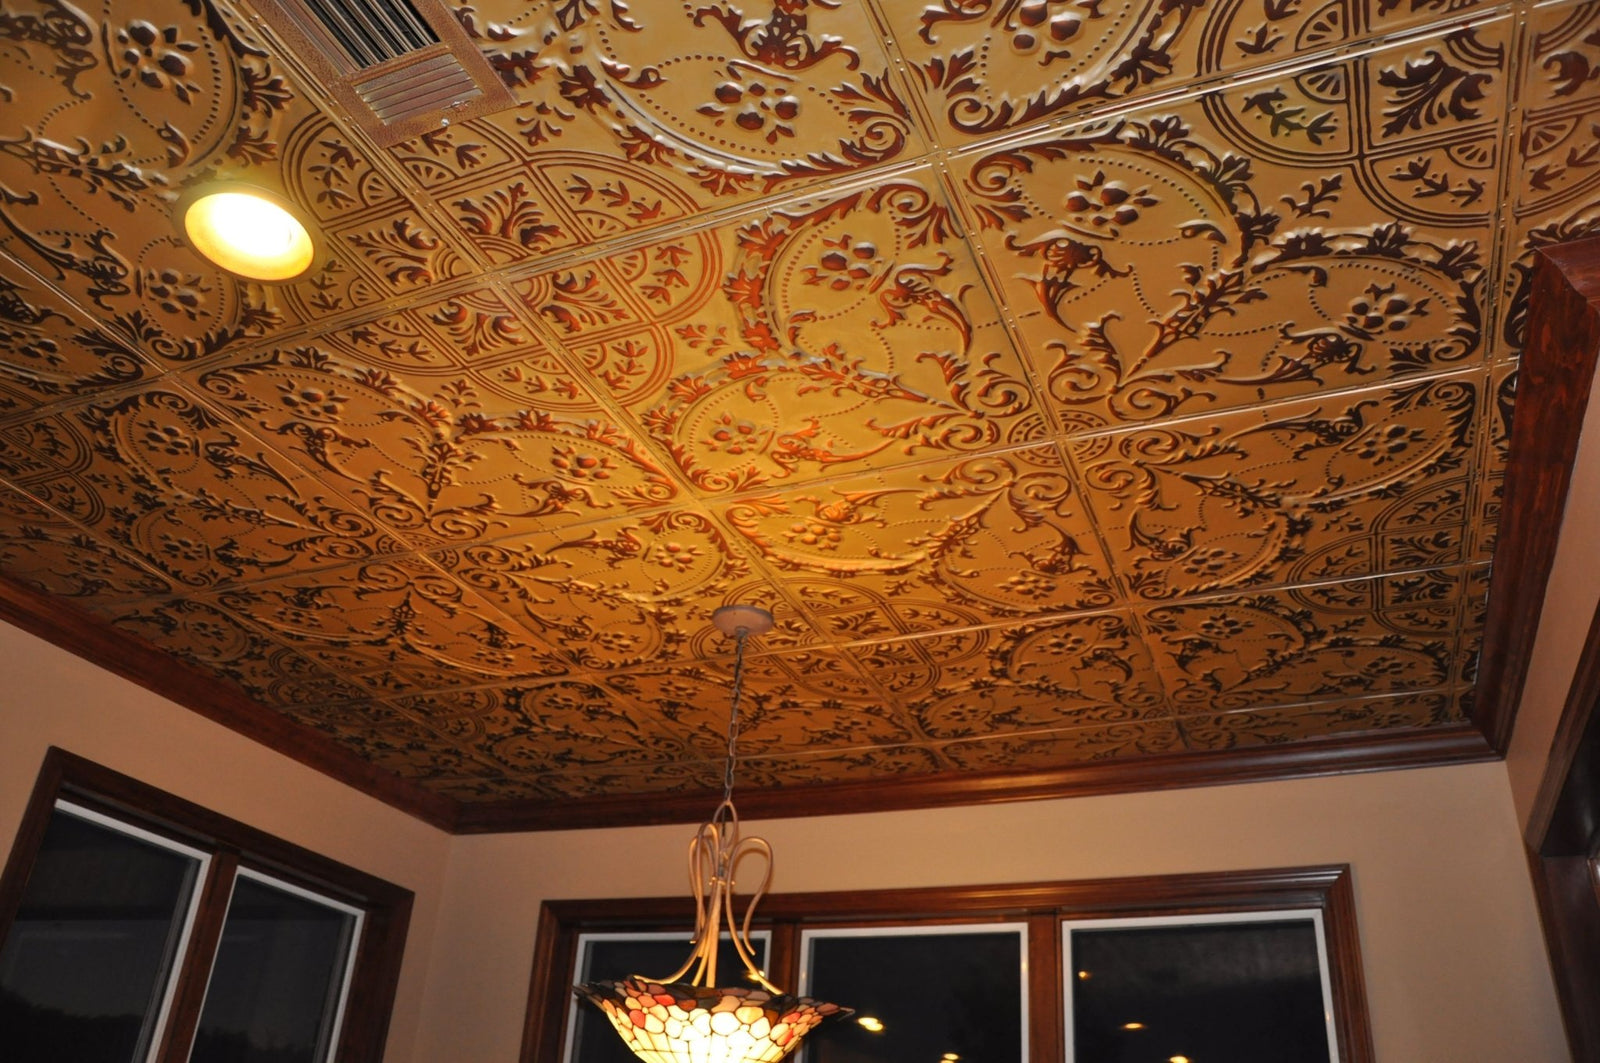
If you want your ceiling to have that traditional, turn-of-the-century look often seen in historic homes, a nail-up installation is likely the best option. With this method, tin tiles are fastened directly overhead, creating a flush, continuous surface with no visible framework.
While it’s not possible to secure tin tiles to drywall alone (drywall doesn’t hold nails well enough for the long term), the solution is simple: add a layer of wood furring strips or plywood backing on top of the drywall. This creates a strong, stable base for the nails and ensures your tiles stay in place for decades.
This method works beautifully in kitchens, dining rooms, or living spaces where you want the ceiling to look like an original architectural detail. The seamless appearance highlights the embossed patterns of the tiles, adding texture and elegance that paint alone can’t achieve.
Nail-up installations require careful planning, such as knowing the number of tiles that you will need. You’ll need to measure and mark your layout before starting to ensure that patterns align properly across the ceiling. Corners and edges are typically finished with decorative molding to give a polished, professional appearance. While this method takes a bit more time and preparation, many homeowners feel it’s worth the effort for the authentic result it delivers.
Drop-In Grid Installation: Practical and Accessible
For ceilings that are uneven, or in rooms where you might need future access to plumbing, electrical wiring, or ductwork, a drop-in grid system is often the preferred solution. With this approach, a lightweight metal grid is suspended just below the drywall, and tin tiles are placed into the grid like traditional acoustic panels—but with a far more decorative finish.
Drop-in ceilings are especially popular in basements, offices, and commercial spaces, but they can also work well in homes where functionality is just as important as style. The slightly lowered ceiling hides imperfections, provides easy access for repairs or upgrades, and makes it simple to swap out a damaged tile without disturbing the entire ceiling.
While a grid system changes the look slightly compared to a nail-up design—you’ll see the grid lines dividing the tiles—the overall effect can still be stunning, particularly when paired with the right molding and trim. Many homeowners find this method quicker to install and less invasive, especially if they’re working with a large space.
Preparing Drywall for Tin Tiles
No matter which installation method you choose, preparation is key to a successful outcome. Start by inspecting the drywall for any sagging, cracks, or water damage. Repair or replace compromised sections before adding weight to ensure a secure base.
For nail-up installations, attach wood strips or plywood to the ceiling joists through the drywall. This step is essential for long-term stability. If you’re using a drop-in system, the drywall itself won’t bear much weight, but the joists need to support the suspension grid.
It’s also a good idea to prime and finish tiles before installation, especially if you’re working with unfinished tin. Painting or sealing them on the ground makes for cleaner application and avoids drips or uneven coverage overhead. Proper finishing also protects your tiles from rust or discoloration in kitchens or humid areas.
Choosing the Right Method for Your Space
Ultimately, the choice between nail-up and drop-in tin tiles depends on your priorities:
-
Appearance: Nail-up tiles provide the most authentic, seamless vintage look. Drop-in tiles create a clean but more modular effect due to the grid lines.
-
Installation complexity: Drop-in tiles are easier and faster to install, while nail-up tiles require added backing and precise measurements.
-
Practicality: Drop-in systems make future repairs or modifications easier. Nail-up tiles are more permanent once installed.
-
Ceiling condition: Drop-in systems are ideal for uneven or slightly damaged ceilings, while nail-up installations look best on level, prepared surfaces.
Both methods can be excellent choices for upgrading a drywall ceiling, offering beauty and texture that no flat surface can match.
The Transformation Tin Tiles Bring
Installing tin ceiling tiles over drywall is about more than just changing a surface—it’s about adding character and dimension to a room. A plain, painted ceiling often fades into the background, while a tin ceiling draws the eye upward, highlighting craftsmanship and style.
With the right planning and installation, tin tiles not only enhance aesthetics but also offer durability and longevity. They resist cracking, won’t sag over time like some other materials, and can even increase your home’s resale appeal as a unique design feature.
Tin Ceiling Tiles Can Transform Your Ceiling
Whether you opt for a traditional nail-up approach with wood backing or a practical drop-in grid system, drywall provides a solid starting point for transforming your ceiling. With proper preparation, thoughtful layout planning, and the right finishing touches, tin tiles can turn an ordinary ceiling into a stunning architectural focal point that feels timeless and elegant. Metal Ceiling Express can help you source tin ceiling tiles quickly so that you can get started on your project.